DocDesigner - cloud version
Table of Contents
Subscription
This is a commercial version of "DocDesigner" for Bitrix24.
It distributes by subscription.
The cost begins from €4,99 per month. You can look for other plans here.
If you wouldn't to pay for it, you would remove it from your Bitrix24 or it will be switched to demo automatically in 30 days.
Settings
The App's setting is very simple.You can add employees that can manage the application.
You can set parameters for documents and switch on e-mail option.
Admins
You can add employees from your company that can manage application, edit templates, etc. You can individually assign the right to delete stored documents.Adding an employee can be done on the link "Add new users". You can pick up employees. Once the choice is made, click the "Select" The selected employees will be added to the list of application administrators.
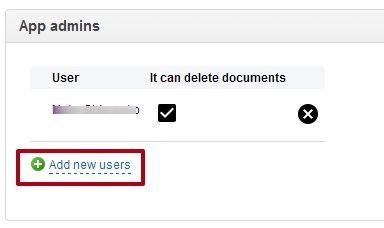
To remove the employee just click on the icon with a cross.
Documents
PDF documents is created by default.For your application you can enable or disable the creation of documents in DOCX and HTML.
You can also enable the "Print only saved documents," it may be useful in cases where a document must have the number. Only saved documents has a number.
Restrict deletion of own documents to employees: disables the ability to delete documents to all employees.
Add to the archive after 30 days: automatically hide the documents in the journal of documents by more than 30 days ago.
Show archive: show all documents in the journal, including archives.
Remove penny: disable the output of the fractional part of all amounts.
Accuracy quantity: allows you to set the number of characters in the derivation of the fractional part of the number.
Use link Task & CRM: connect event, which will establish the link between the objectives and CRM objects in the application. This option will be relevant in the case, if you use an application to generate documents on the basis of tasks and you need a coherent information between task and Deal (lead, etc.).
Create CRM invoice based on this template: when creating a document based on the template selected in the list will be established "standard" bill Bitrix24 with the same number.
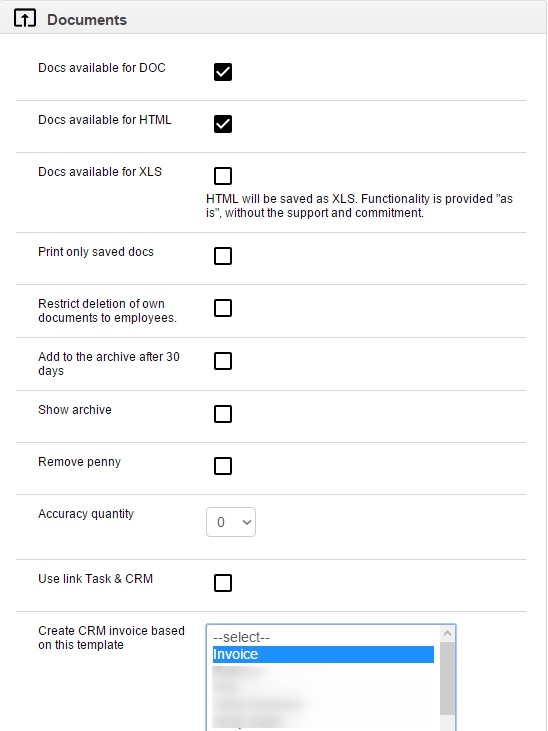
Docs available for XLS: this option connects the creation of documents in XLS format. This feature is implemented to produce documents in the format of "summary sheet". Support for this format is not carried out. The ability to generate XLS is provided "as is".
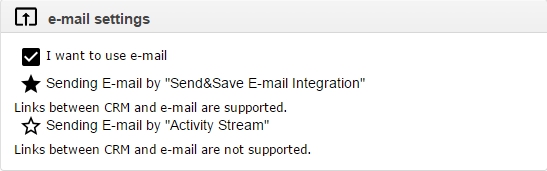
For using e-mail sending on your Bitrix24 you should be set up "E-mail integration" (/crm/configs/sendsave/).
When using the method for sending e-mail by Save&Send technology the mail will be associated with CRM entity. A letter will be sent from the common e-mail of CRM.
When using the method of sending e-mail by Activity Stream the mail will not be associated with CRM entity. A letter will be sent from the personal Bitrix24 address of employee.
Doc's numbering
The "DocDesigner" has engine for automatic numbering of documents.Manage of numbering available via "Numerators" in the toolbar.
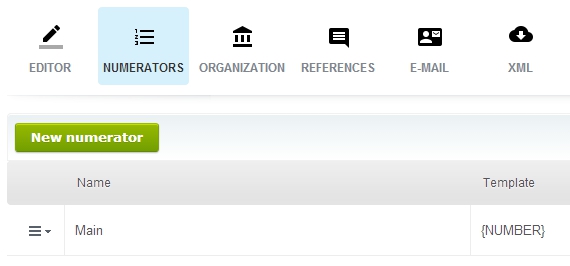
| To add a new enumerator press |
| To edit or delete enumerator press | and select the appropriate action | 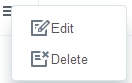 |
Form settings
Name - the name of the numerator to be used when you select the template editor.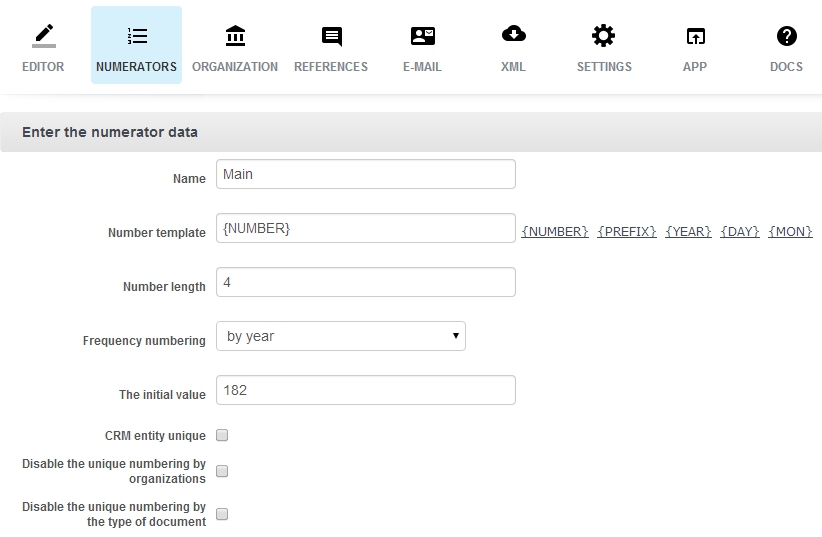
The main part of the numerator - is a "Number template"
Number's template
Number template is required.
You can use any symbols for number's template. There are some presets are available.
{PREFIX} - numbering prefix. It can contain any characters that can be set before saving the document. The prefix can be used for additional identification f document. For example, WEB, HR, IT, etc.
{YEAR} - current year (four digits)
{DAY} - today (two digits)
{MON} - current month (two digits)
Examples of templates and numbering
| {NUMBER} | {NUMBER}
0001 0002 0003 etc. |
| 15{MON}-{PREFIX}{NUMBER} | 15{MON}-{PREFIX}{NUMBER}
1501-IT-0001 1501-WEB-0002 1501-IT-0003 1502-IT-0004 1502-WEB-0005 1502-HR-0006 etc. |
Number's length
You can set the length for the nummber. If the value is greater than 1, then the number will be added to the left with zeros. If the value is 1, the number is displayed "as is".
For Example,
| Number's length
| Example |
| 1 | 1, 3, 15, 125 |
| 3 | 001, 003, 015, 125 |
| 5 | 00001, 00003, 00015, 00125 |
Frequency numbering
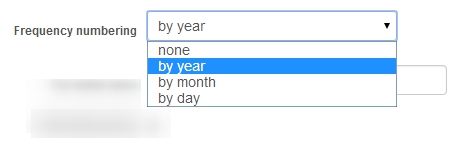
For each enumerator you can set the frequency. This parameter is responsible for resetting the value enumerator within a specified period.
| Frequency | Action |
| none | no reset
|
| by year
| reset by January, 1st
|
| by month
| reset by 1st day every month
|
| by day
| reset every day
|
Initial value

For each enumerator you can set the initial value. The default value is 1 and the numbering starts with 1. If you want to continue the already started numbering, specify in this field the initial value. The initial value doesn't need for extra zeros to the left, prefix, ets. It needs only digits.
In this example, the first number of the saved document will be 182. Next in 183, 184, etc.
Important: it works only for first document. If you have already saved documents, this value is ignored and the numbering is continuing.
CRM unique
This option allows you to track unique number subordinated particular object CRM. For example, deal or invoice.
This option can be useful for creating applications. For example, you create a contract, which is subordinated to the deal. You can bind this deal and multiple applications and their numbers will be unique by the deal. For any other deal numbering of applications will start by 1 and tracks unique by this deal.
Organizations' unique
If you manage your documents for several organizations, the each organization has its own unique number by default.
If you require a "pass-through" numbering for all documents, you should to disable this option by checkbox.
Doc-type' unique
Any number's template can be used for multiple document types (templates). Each document type (template) has its own unique by default.
If you want to "pass-through" the numbering of documents without a document type, you should disable the unique by checkbox.
| Default | Disable |
| Invoice 001
Contract 001 Invoice 002 Invoice 003 Contract 002 Invoice 004 Contract 003 etc. | Invoice 001
Contract 002 Invoice 003 Invoice 004 Contract 005 Invoice 006 Contract 007 etc. |
Editor
Templates Editor allows you to create an unlimited number of templates. You can put any tmp into folder. You can edit existing templates or delete them.Warning: if you remove template, it couldn't be restored.
Sections
You can organize the templates into groups. The number of groups is not limited.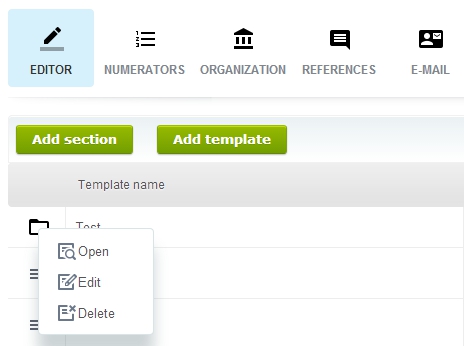
You can add, edit, delete groups.
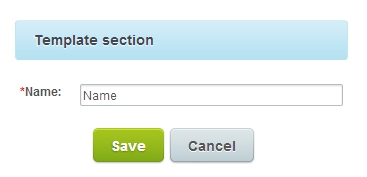
To add a group, click
In the opened window, specify a group name and click "Save"
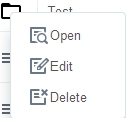
If you want to change the group name, select the appropriate item drop-down menu
You can delete the group. All included templates will be removed.
Warning: deleted group & templates couldn't be restored.
Features
You can add, edit, copy and delete templates.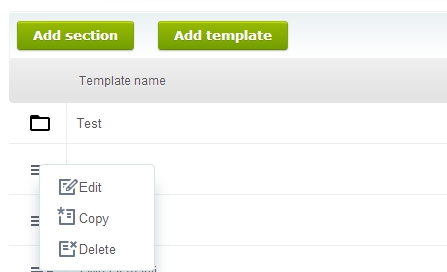
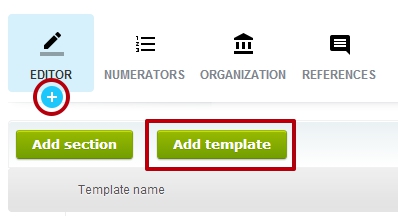
Add
There are two option to add new template:- click the "Add template"
- move the mouse cursor to the "Editor" icon will be +
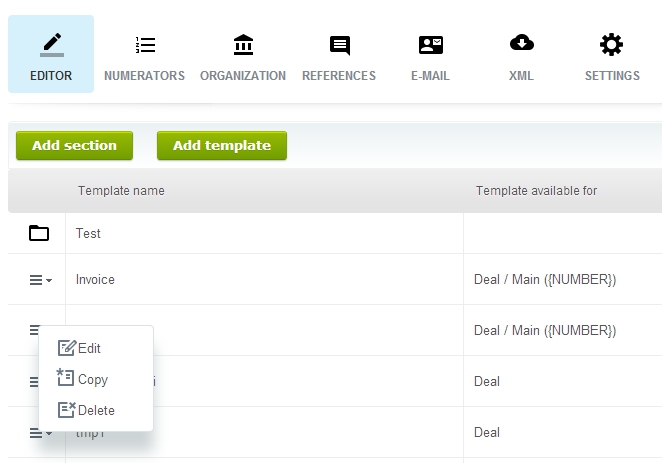
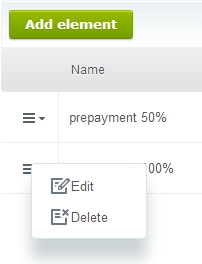
Edit, copy, remove
You can edit, copy or delete template via the drop-down menu.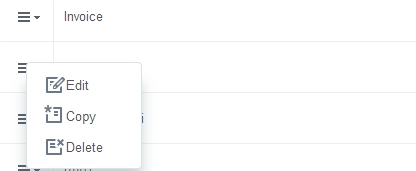
Warning: removed template couldn't be restored.
Tmp Editor
Template Editor is a simple and functional WYSIWYG- editor.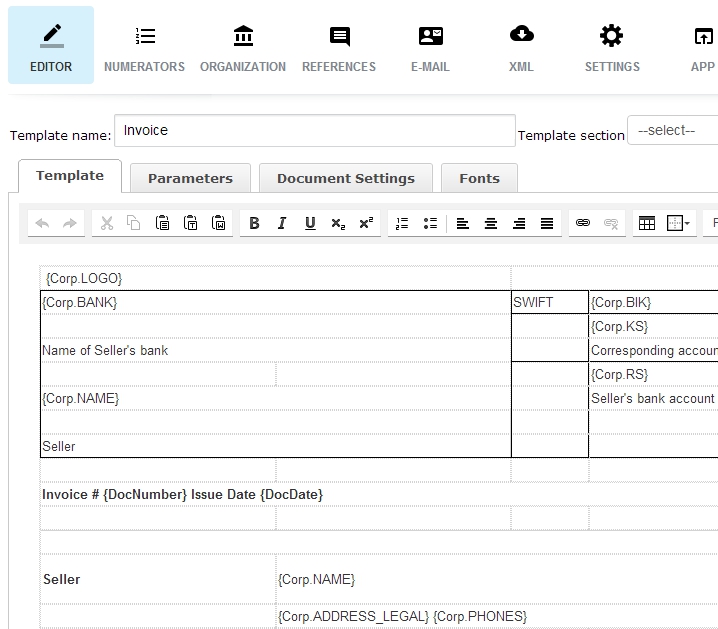
Tmp Name
Template name - is required. You can use any character set.
Also, you can select a folder for the template:
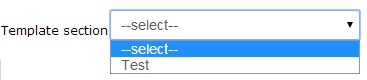
This parameter is optional. If you do not specify a location for the template, it will place at root.
Tmp Parameters
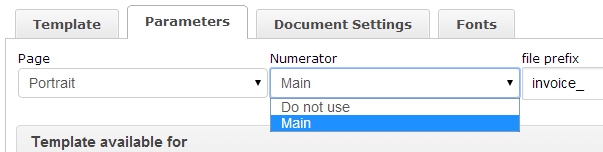
You can set the basic parameters of the document:- page orientation: portrait or landscape
- numerator - is used to assign the document number
- template for the file name
As a template filename is available use the following variables:
- {Deal.TITLE} - deal title
- {Company.TITLE} - company name
- {DocDate} - doc date
- {DocNumber} - doc number
Tmp accessibility
Block "Template available for" provides "visibility" of the document through the application.
This template will be available for the deals and invoices.
Depending on the type of object, will form the drop-down menu for the template editor.
Only for business process: this option avoids the formation of the document in the application context. If this checkbox is checked, the document will be created only within a business process.
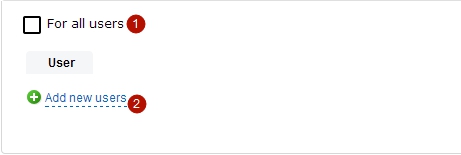
By default, any template is available for all users.
You can provide access for some employees. For the rest of the staff this template will be invisible.
Custom parameters
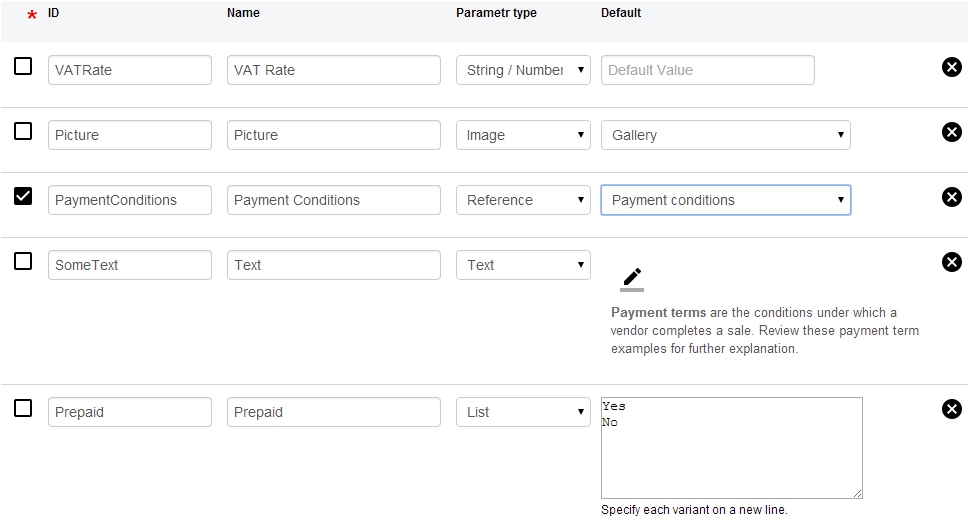
You can add an unlimited count of additional parameters to each template. These parameters are expand of the current document.Important: parameter ID must contain only letters and digits. Using other symbols is forbidden. Don't start id by digit. You can use digits only by 2nd position.
- parameter ID - an internal variable, used by the application
- name - is the external name of the parameter, may contain any set of characters. Parameter name is used in the drop-down menu while template editing.
- type of the parameter - determines the type of value
- default - depending on the type, may be used to set default value or to select the reference.
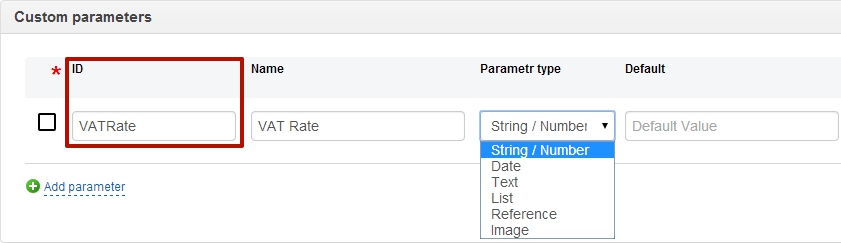
There are several types of parameters:
- String / Number - the easiest option
- Date - while editing the document will be able to select a date from the calendar
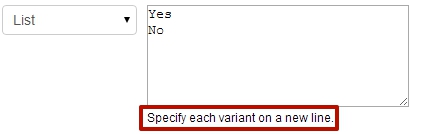
- List - allowed to organize a drop-down list of items
- Text - any large text, html is supported
- Reference - a link to the inner reference . Also it allows you to organize the drop-down list.
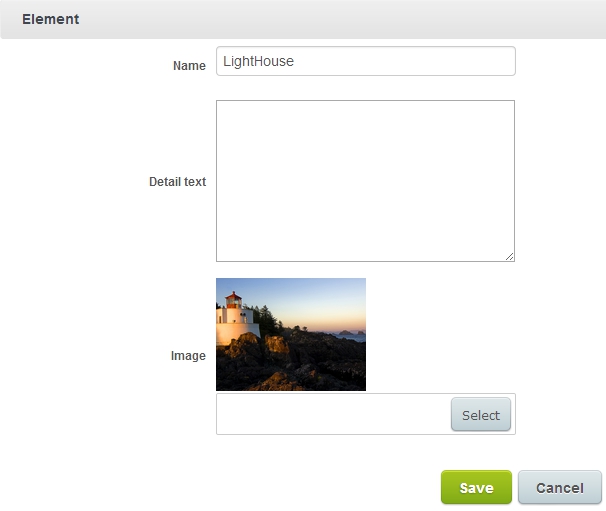
- Image - a link to the inner kind of reference. Also it allows you to organize the drop-down list with images. The main value for this one is image.
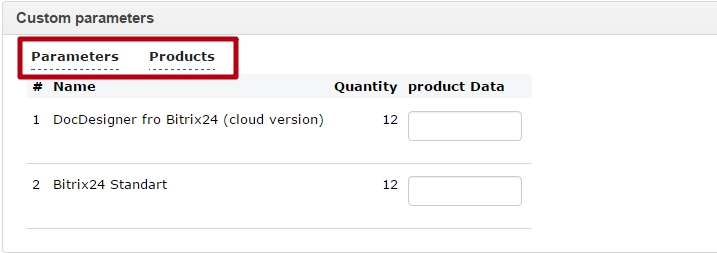
Scope of use
By default, all custom parameters are added to the "header" of the document. You can assign parameter to use it with the goods. To do this, simply tick sign of inclusion in the tabular part.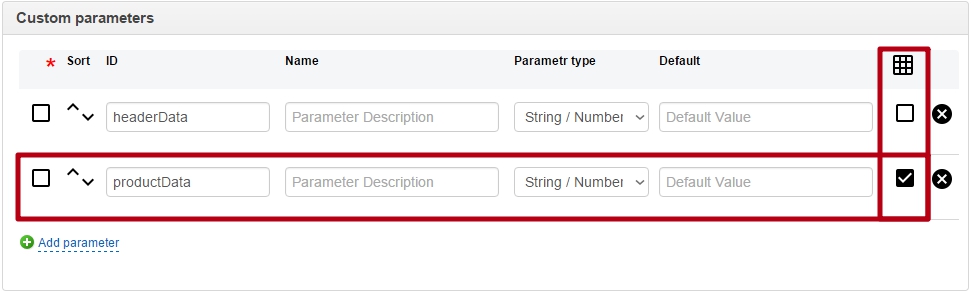
When editing a document two tabs "Parameters" will be available, and "Products".
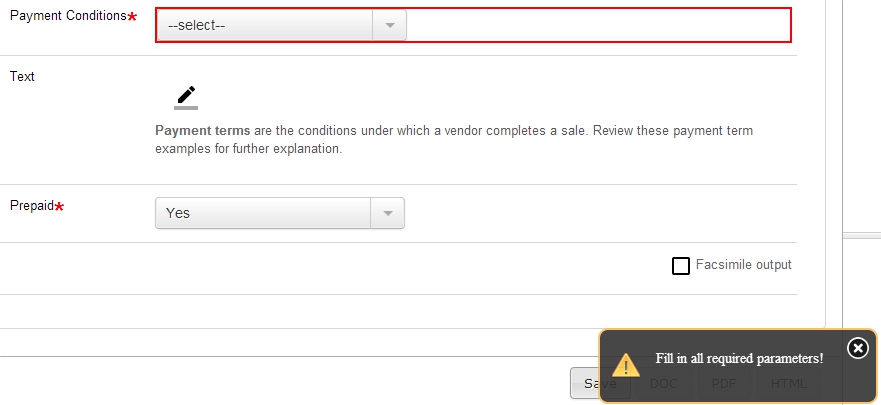
Requires
You can use the feature "required" for the parameter. In this case, the document will not be saved if the parameter is not filled.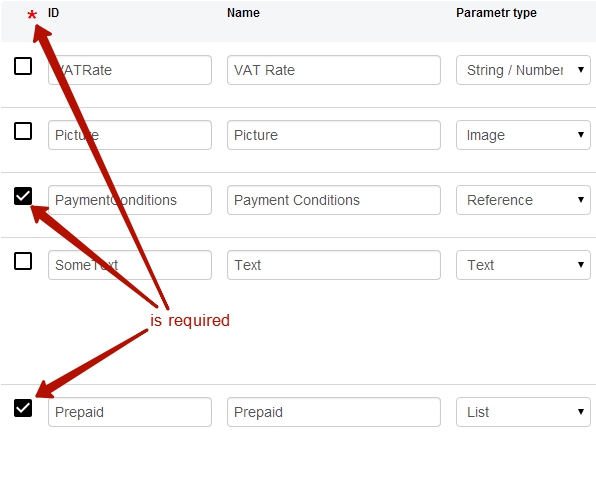
Text
To modify a parameter of type "text" is used a visual editor that opens when you click on the edit icon.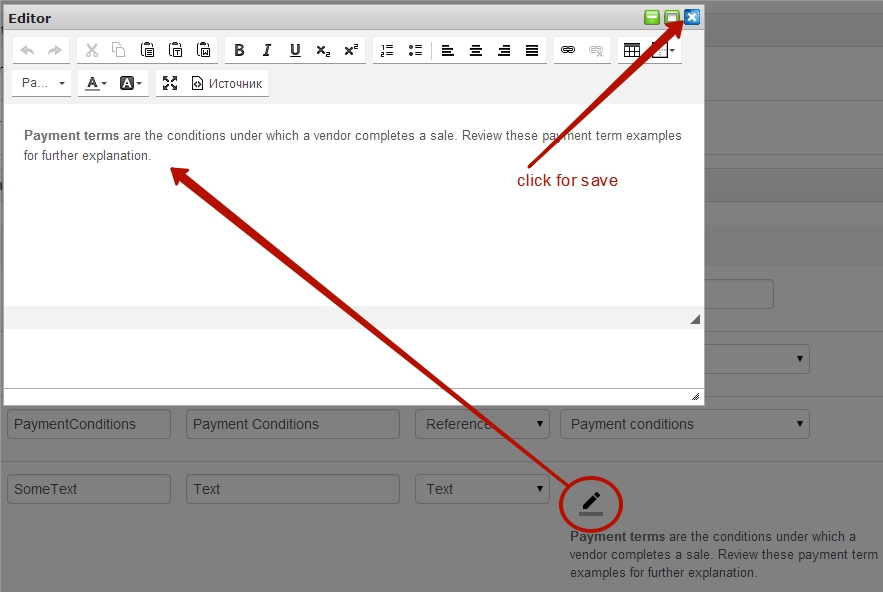
To save the text just close the editor window.
List vs Reference
"List" or "Reference" - what to choose?A visualisation is the same for both types:
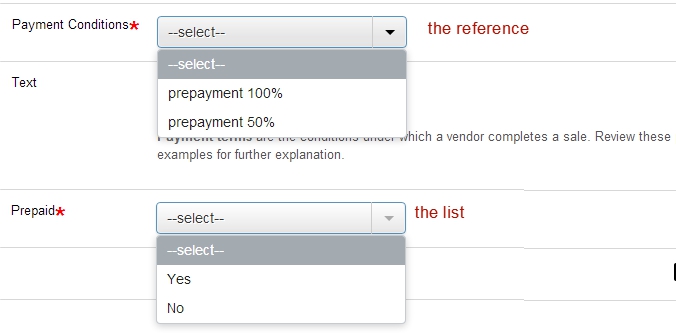
What's the difference?
| The "List" | The "Reference" |
|---|---|
| 1. A method for editing | |
 |  |
| The "List" is edited directly in the template. | The "Reference" is edited in a special section of the application. |
| 2. Scope of "visibility" | |
| List of items is only available to the current template.
"Local" scope. | List of elements can be used in any template.
"Global" scope. |
| 3. Value(s) | |
| Only one value. | Name, description, image |
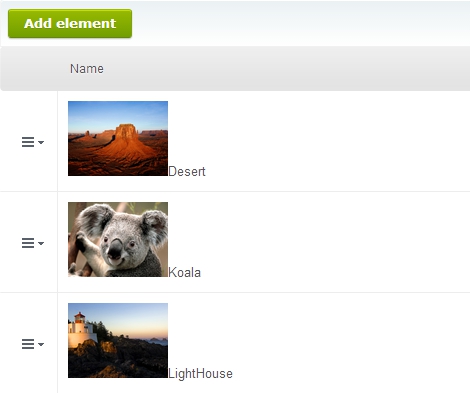
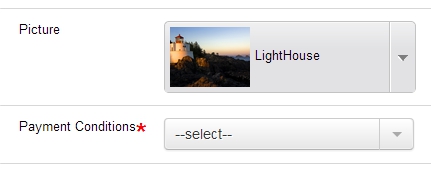
Image
Gallery - a reference that optimized for work with pictures.The list of items has a preview.
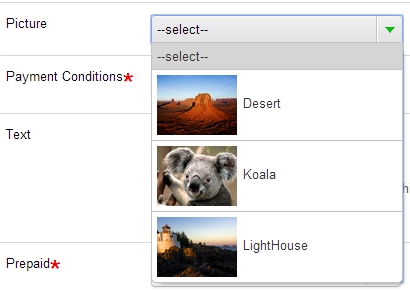
The drop-down items has a thumbnail and title.
Important: image outputs "as is", no scaling is performed.
Page settings
For the each document you can set page margins, background and some parameters for footer.The variables for footer can be set via drop-down menu.
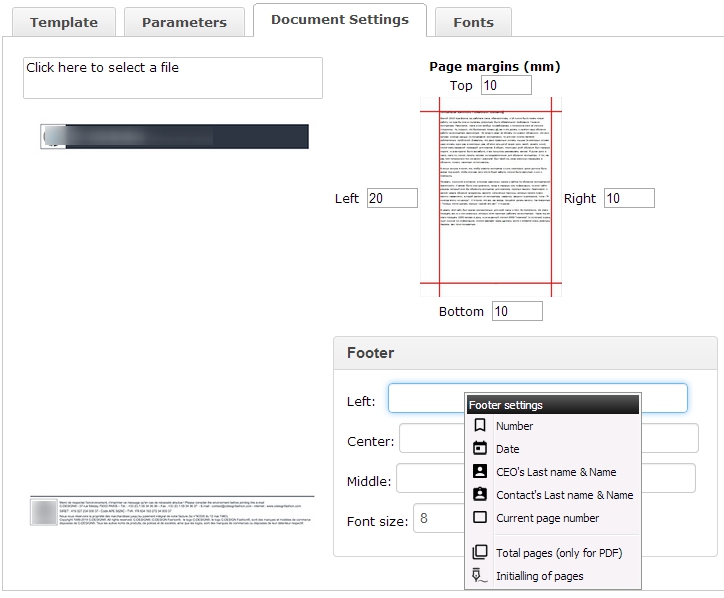
For the background is recommended to use the jpg-file, size 792 to 1072 pixels (A4).
Font settings
For each type of document you can choose own font.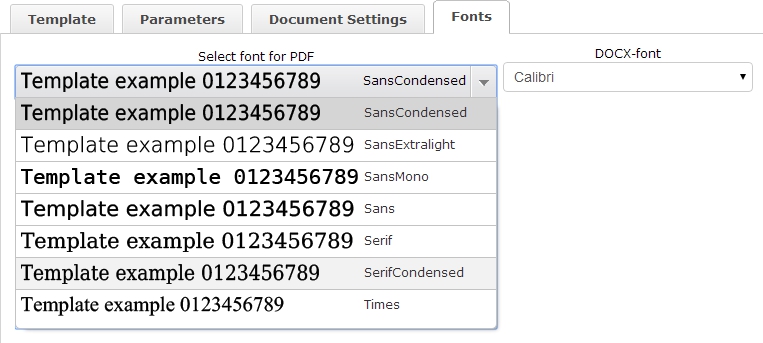
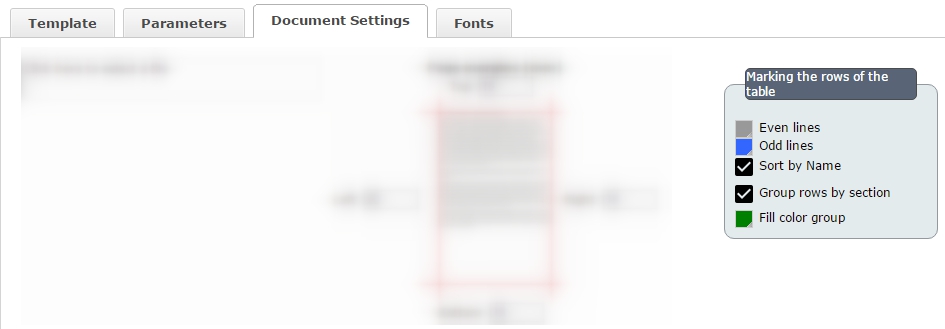
Rows decoration
You can use the different design options for the table rows of goods.- set the background for the even and odd lines;
- display a list of products, sorted by name;
- display a list of products with the division into groups, the string with the name of the group will be added automatically;
- set a background color for the row with the name of the group.
Templates Editors
The DocDesigner supports creating and editing templates in two formats: HTML and DOCX.To edit the HTML template use the WYSIWYG editor. To edit DOCX templates use Google Docs.

WYSIWYG
A template is a set of text and html-tables with different number of rows and columns. The number of tables is not limited, and may be used solely for ease of editing template. For example, "Invoice" template included in the distribution consists of three tables.You can use a toolbar or drop-down menu for work with template.
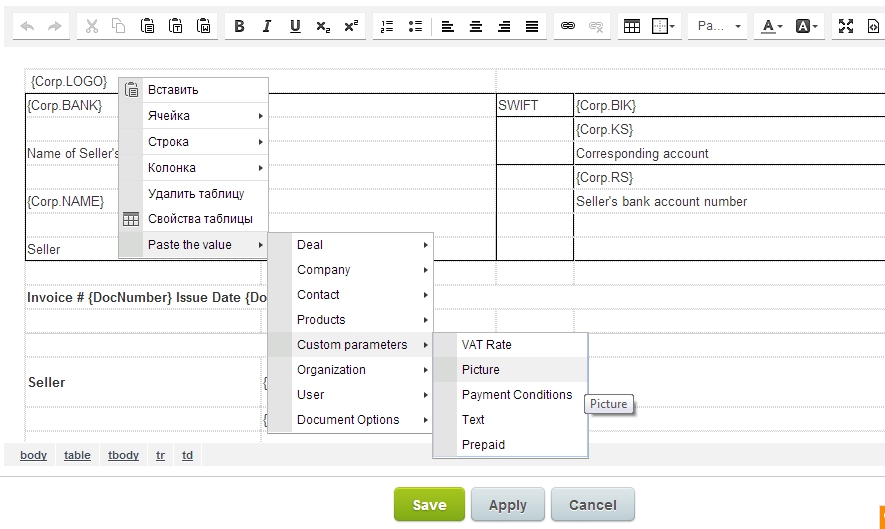
The template contains text information, which is not changed and a set of variables. To add a variable just call drop-down menu (right click) and do select.
Drop-down menu is separated by context that depends from "Template available for".
Products table
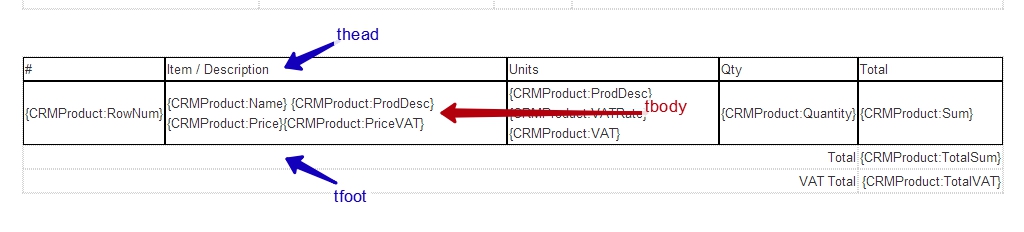
If you need to use products tables from the deal or lead, you need for html-table with specific structure<thead>
Headers
</ thead>
<tbody>
Products rows
</ tbody>
<tfoot>
Footer
</ tfoot>
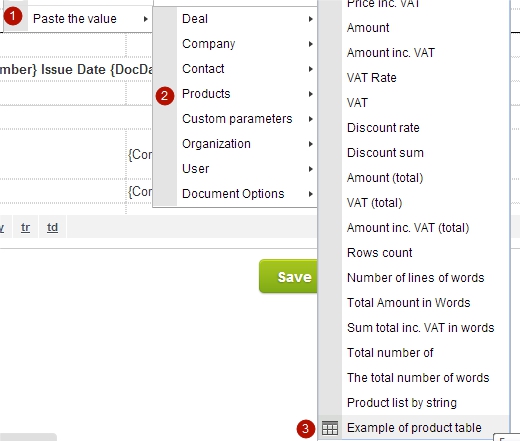
A html-table with a required structure can be added by drop-down menu Paste value -> Products -> Example of product table
If you have added a table with products (or copied from the other source) you should to modify it via html source and made compatible structure.
Important: <tbody></tbody> should contains only one row. It'll be copied and filled by data as source has rows.
No in menu
For rows:{CRMProduct:DiscountRate}
{CRMProduct:DiscountSum}
{CRMProduct:PriceDiscount} - price discount free
{CRMProduct:SumDiscountFree}
For total:
{CRMProduct:TotalSumDiscountFree}
{CRMProduct:TotalDiscount}
Google Docs
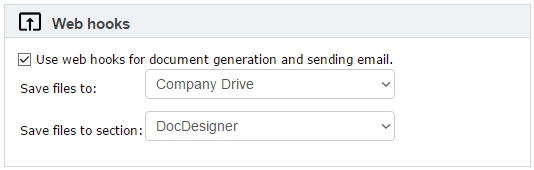
1. Create a folder on the Company drive where the templates will be stored.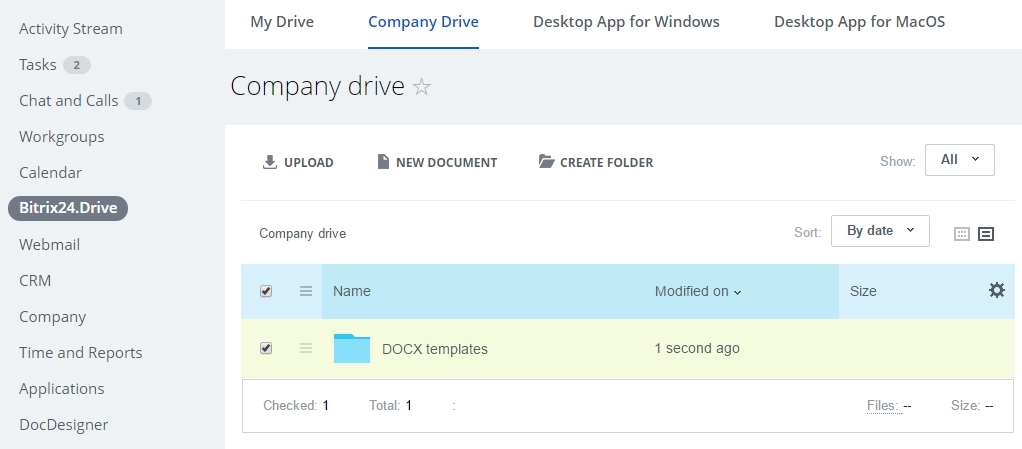
2. Specify this folder in the application settings.
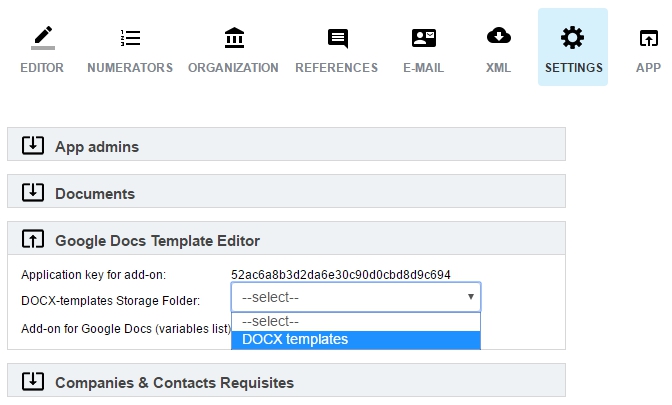
3. Install the add-on for Google Docs to work with the "Document Designer" variables. The installation link is located in the application settings.
4. Copy the application key, it will be needed to connect the add-on to the editor.
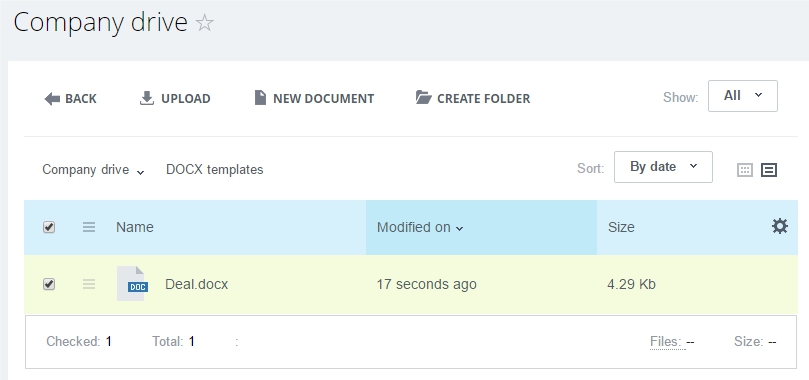
5. Open the Company drive -> Google Docs section and create or upload a document.
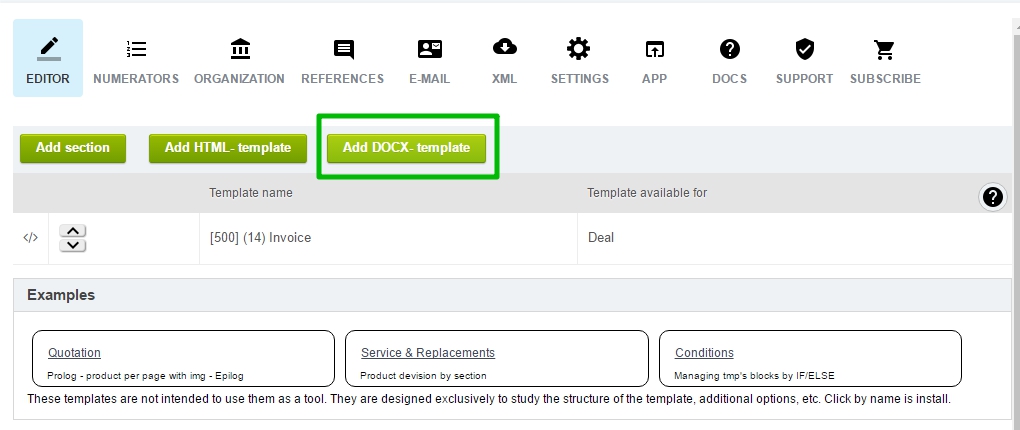
To add a DOCX template to the DocDesigner, click Add DOCX template.
Select an available template from the drop-down list.
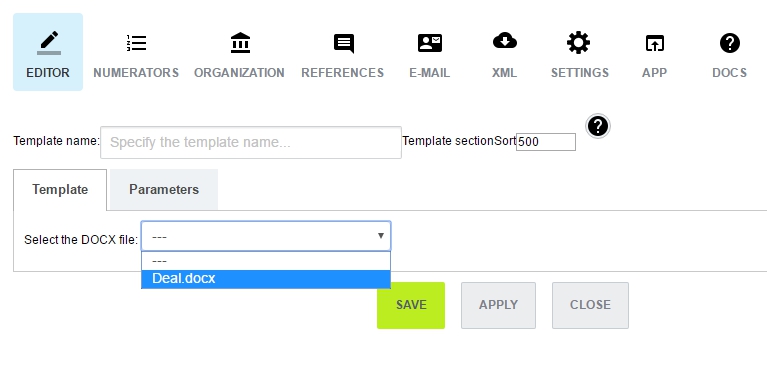
The document preview is loaded. It is strongly recommended not to edit the template in this window.

Save the template and you can use it as usual.
Own companies
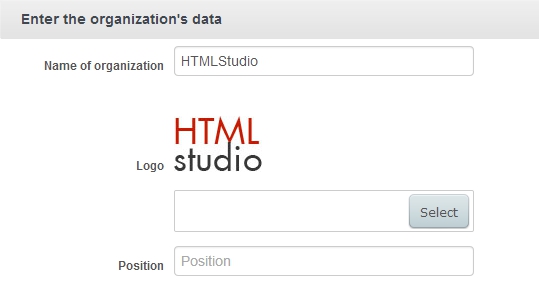
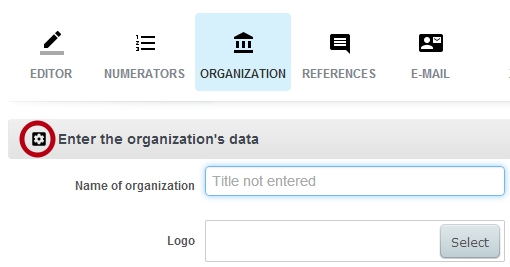
Organizations is a list of own companies.You can manage an unlimited number of own companies.
Each item can be edited or deleted.

Click plus icon for adding new company.
The company's form has fields for company logo, CEO facsimile, banking info, etc.
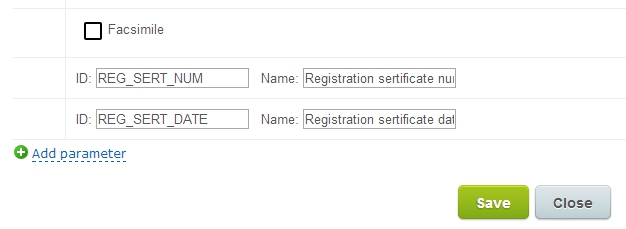
Fields management
You can manage the organization's fields:- switch visibility of the system fields
- add / delete / switch visibility of custom fields

Simple facsimile
Simple facsimile contains a picture that has a stamp image of the organization and the necessary signatures.
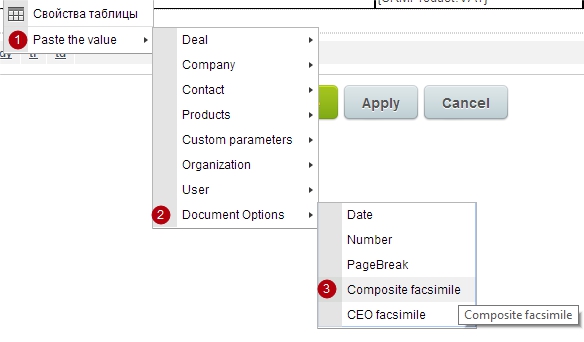
Composite facsimile
Composite facsimile joins from setting its own entity. This type of facsimiles convenient to use when working with several own entities and the different names of posts.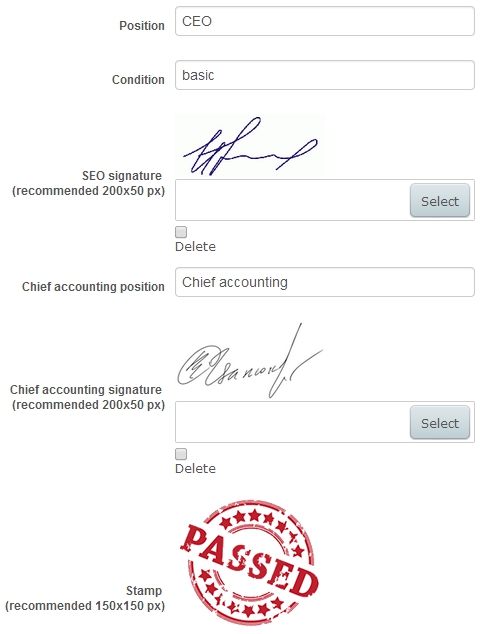
CEO's facsimile
CEO facsimile can be used to insert it into the contract, which requires only one signature of CEO.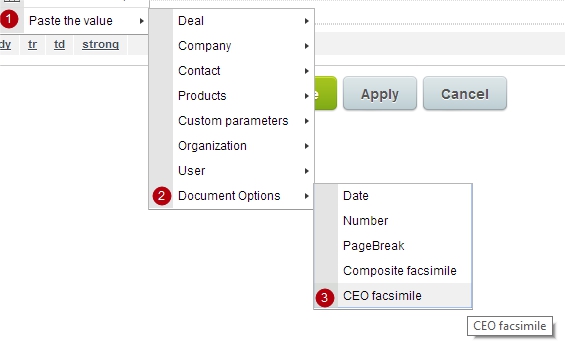
Initialling of pages
The initializing pages - inserts CEO signature in the footer of each page.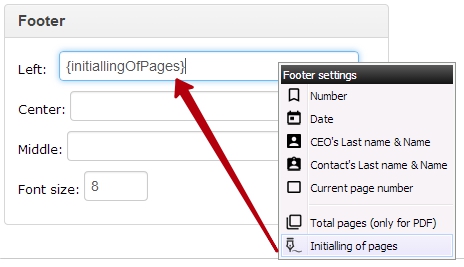
Document
The document form provides an interface to select the parameters and receive the filled form.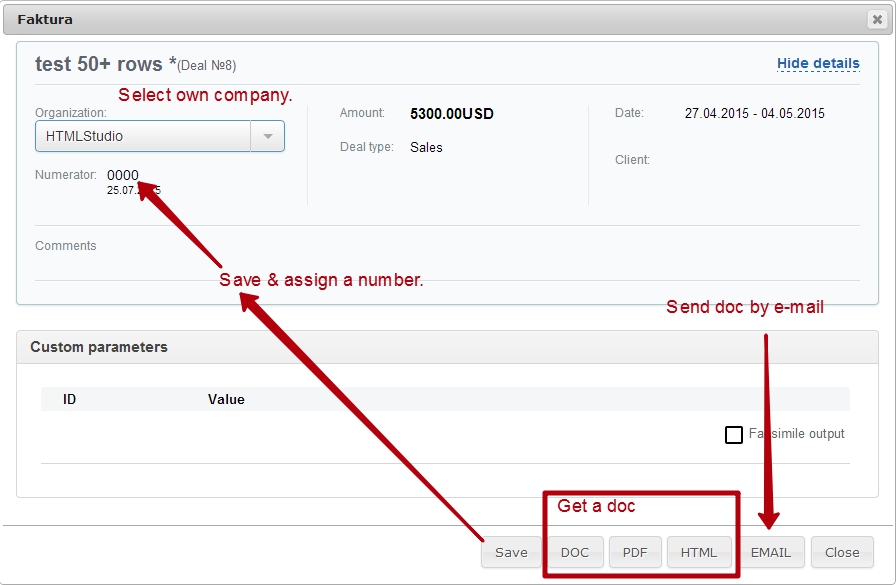
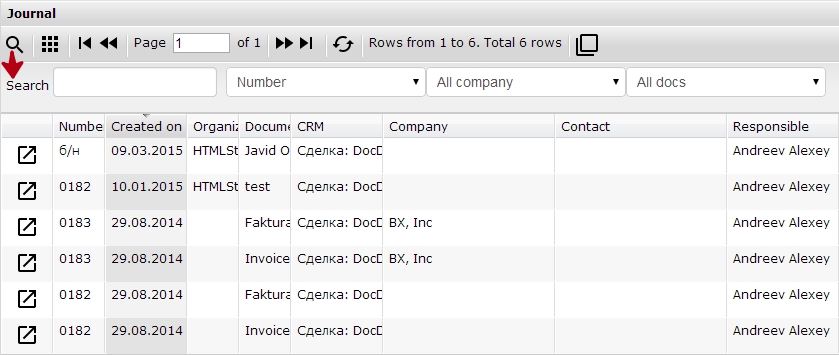
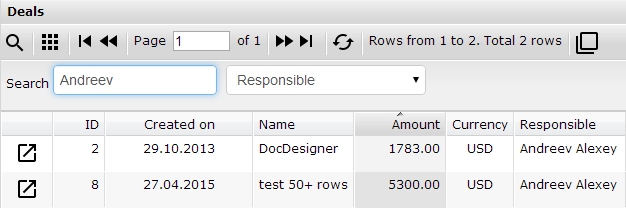
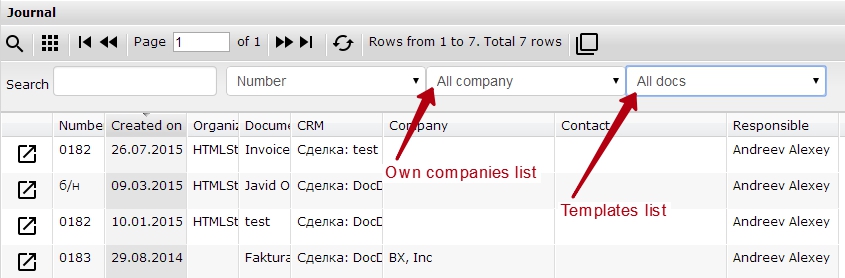
Journal
Journal contains a list of all saved documents.Administrator and author of the document can view, edit, or delete a document.
Features
- sorting
- searching
- column managing (show/hide, order, width)
Each user has personal settings (saved automaticly).
Batch processing of documents
The "batch" is intended to save, generate documents of the same type.For example, you can save several invoices by one click, set parameters for each one and get the PDF. Each document will begin on a new page.
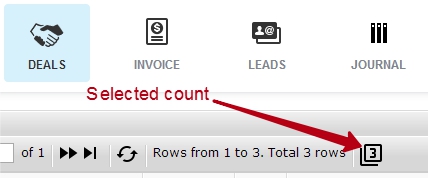
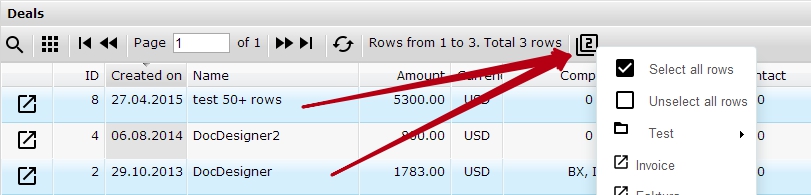
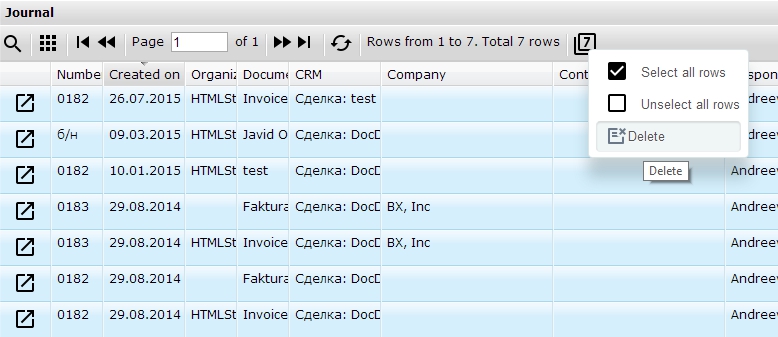
Objects selection
To operate in batch mode it is necessary to select two or more rows. Selection is single-clicking on a line in the list of CRM. It works in any column except the first. For unselect just click on the row again. It is possible to select and unselect all rows.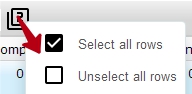
After selecting all the necessary rows, press batch icon
Batch form
The batch form looks like a regular document. The difference is that instead of the detailed information from CRM displays list of doc type. If the selected type of document has already been saved, it displays the number and date. If it hasn't been saved, it outputs * (star icon).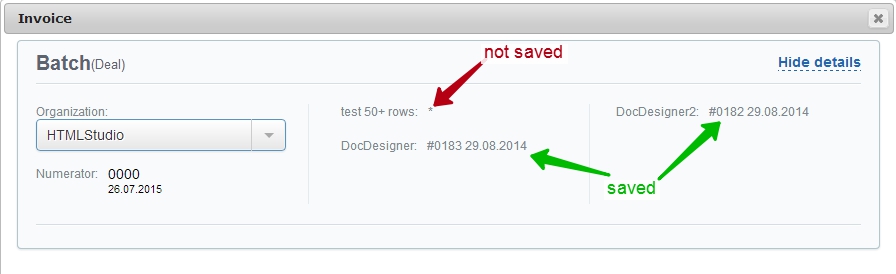
To save the existing and new documents just click "Save"
Save Batch
While saving documents the application window is blocked. When all documents are saved, new documents are numbered.Important: all documents will be saved with parameters selected in the batch form.

Run Batch
All documents are creating by regular means. You can create any of the formats available with / without a facsimile.Each document will begin on a new page, and the number of pages in the resulting file will match the number of selected objects CRM.
Delete Batch
The portal administrator and users who have been assigned for delete documents, have the ability to batch delete saved documents.Important: restore of deleted documents it doesn't support.
Summary (Consolidated report)
Summary - it's a kind of batch document that can be based on the several objects CRM.This one may be used as a report. For example, you can form a list of deals (invoices) by one company or by responsible. You can get a list of companies or contacts by responsible, etc.

Tmp Parameters
For get "Summary" you should checked the named option.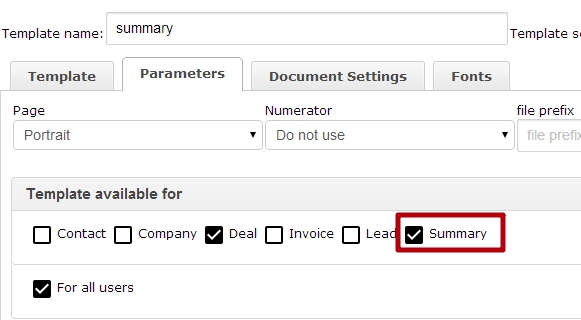
All other parameters save their means.
As an example of a summary it used deal list.
Important: this format hasn't product table of deal (lead, invoice). It works with CRM "headers" only.
Tmp features
The template requires two statements:- html table with CRM heades has CSS-class "summary". It could be edited via html source.
- table row with CRM headers must be enclosed within the html-tag <tbody> ... </ tbody>. It also can be done via html source.
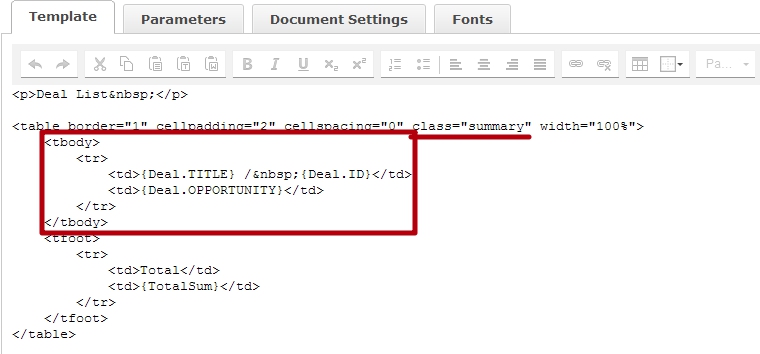
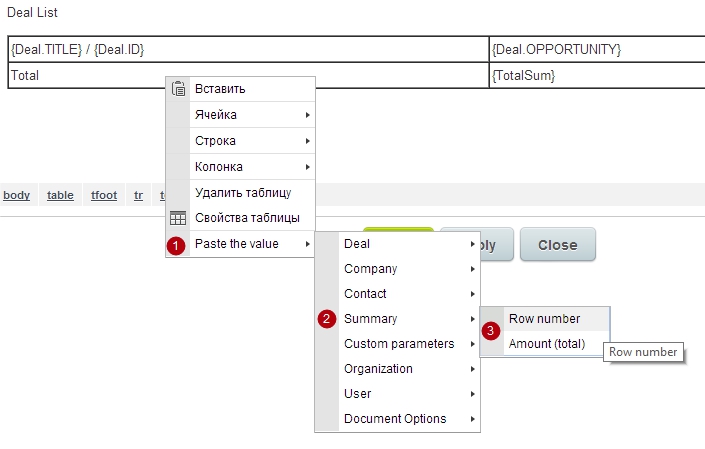
If "Summary" is checked, it turns off item "Products" from drop-down menu. This one replaced by "Summary" that contains "row number" and "total".
Moreover, you can use the facsimile.
You no longer have to print the document, sign it, scan and apply to the letter. Now it can be done by a single button.
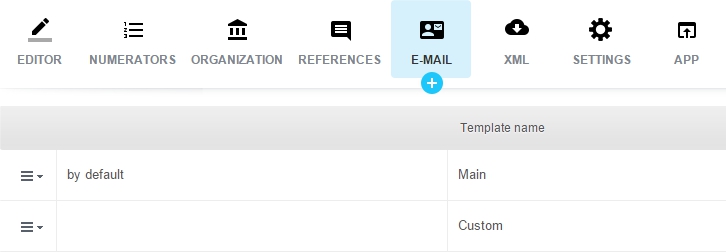
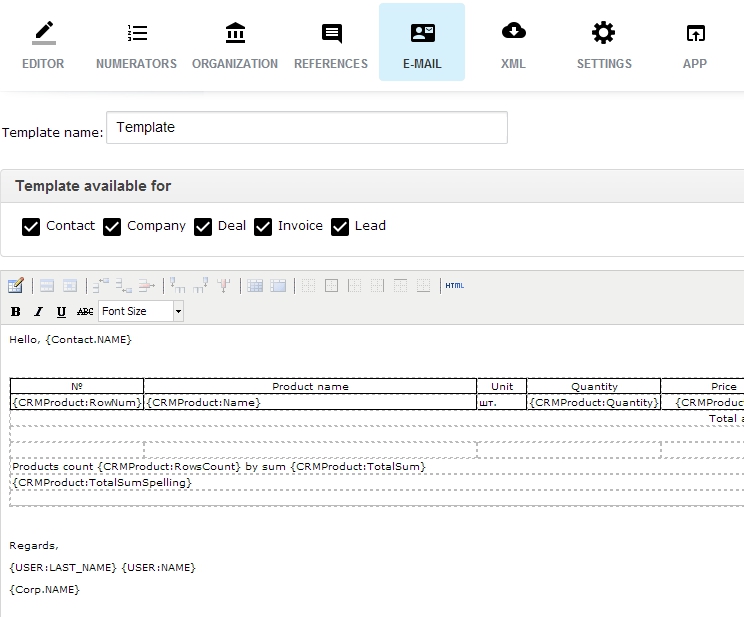
If you have enabled the e-mail mode in the application settings, you can configure your mail template. Template editor has a familiar look.
Number of e-mail templates are not limited.
Once the template is set up, you can send an email. To send a letter just press the EMAIL

opens form with filled template and documents list
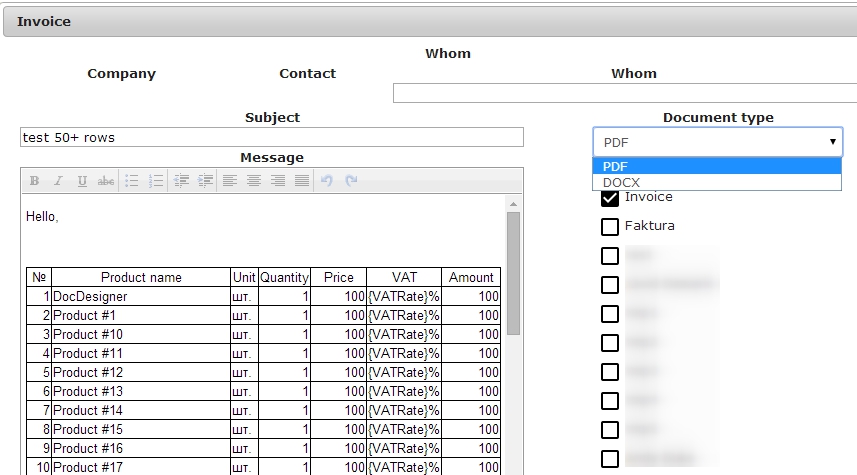
Select the document format (PDF or DOC), documents type (you can select any types), select the recipients and click "Send." All submitted mails will be saved in the CRM activity.
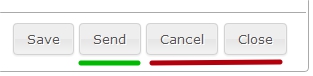
If you decide not to send the letter, click on "Cancel" or "Close".
Grids
All objects that the application works are displayed in the form of grids.With the toolbar you can:
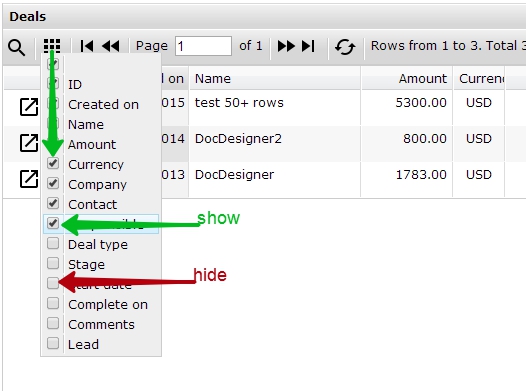
- show/hide columns
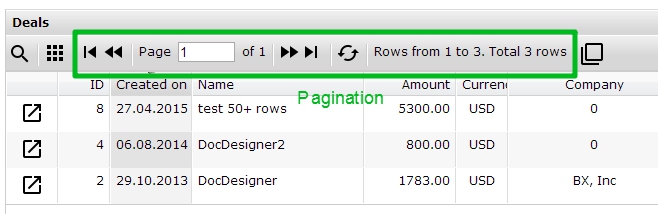
- to navigate through the pages
- manage data sorting
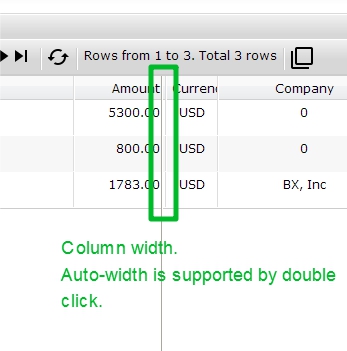
- control the width of columns
- control the order of columns
Show / hide columns
Pagination
Data sorting

Column width
Search
You can use search and filter in grids.To activate this option огые click
 on the toolbar.
Specify the props for the search and the enter value. Search is case insensitive and works with the part of value.
Journal of documents has more options to filter and display.
Cookbook
This section contains descriptions of useful features, such as:Formulas
Attention!- It requires special care
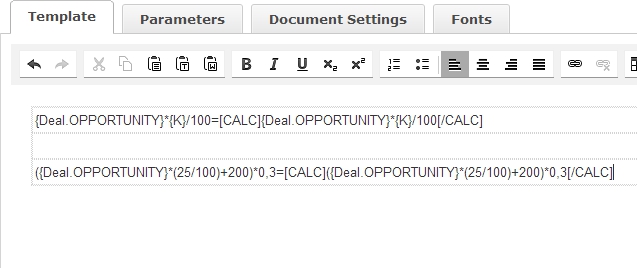
You can use the formula for calculating directly in the document. Implemented basic arithmetic:
- addition ( + )
- subtraction ( - )
- division ( / )
- multiplication ( * )
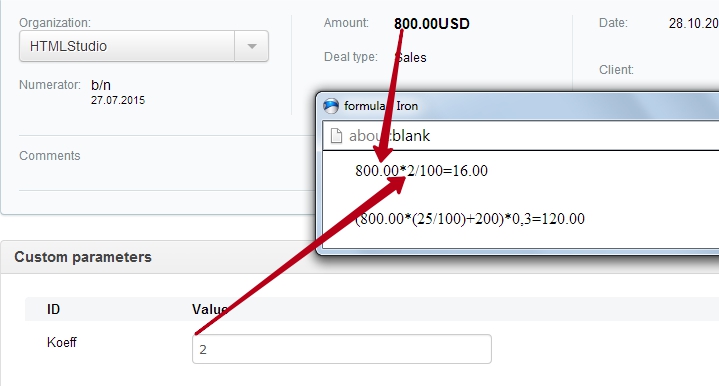
You can use constants (aka digits), basic fields of CRM, the custom fields and additional template parameters. All parts of formula should be implemented as "number" or "integer". If you insert into formula a non-digit variable the formula will not be calculated.
To calculate expression enclose it in [CALC] [/CALC].
Conditions (if/else)
You may use conditions in your template for show different parts of document that is depended by some condition.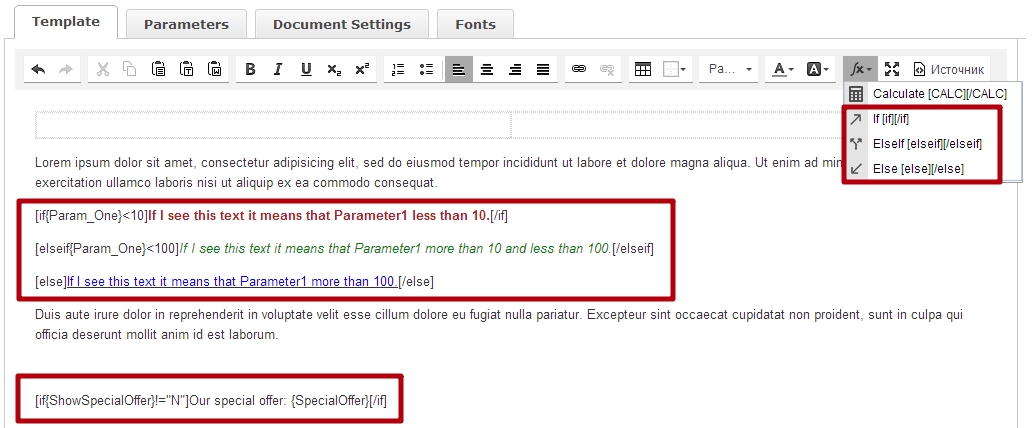
Here a small video how it works.
How to do?
How to check that date is filling?[if strtotime("{dateVariable}") > 0]date is filling[/if][else]date is empty[/else]
How to check that string is filling?
[if strlen("{stringParam}") > 0]string is filling[/if][else]string is empty[/else]
XML
You can download the necessary documents in XML. Format is not standardized. If you have any special requests, please contact via the built-in support, we will try to implement it.
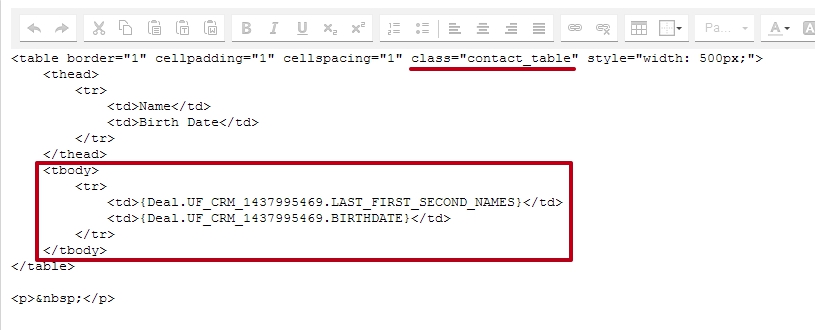
Students
"Students" - is a code name.Recipe: deal has a custom field as "Bind To CRM Elements -> Contact" and checked "Multiple". You can made select from linked fields of "Contact". The table of contacts has similar features as the products table.
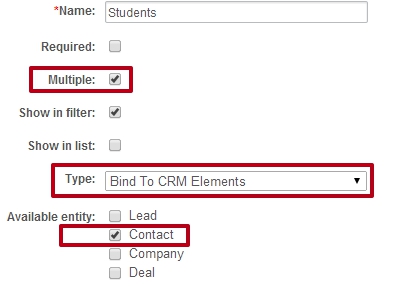
There is only one "but": the app should "recognise" this table for contacts, in this case you need to put CSS-class "contact_table" into table header, it can be done by HTML-source.
Date formatting
If you want to display the date + time, use the Time suffix before the closing bracket}If you want to display the date with the month in words, use the suffix Spelling before the closing bracket}
Plugins
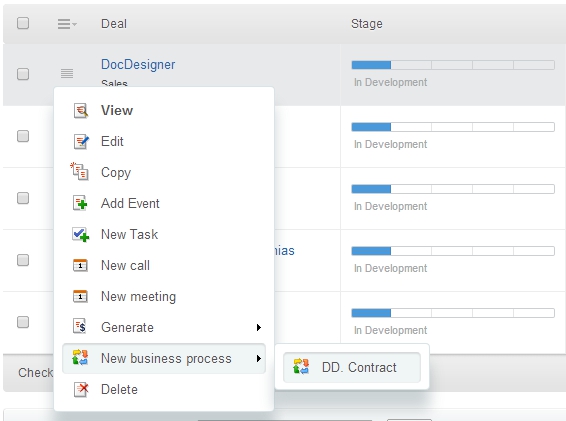
Additional plugins for the "DocDesigner" extends the application abilities.To connect "business processes" and "events" plugin you have to install the application "DocDesigner: Automation"
Business Process & Drive
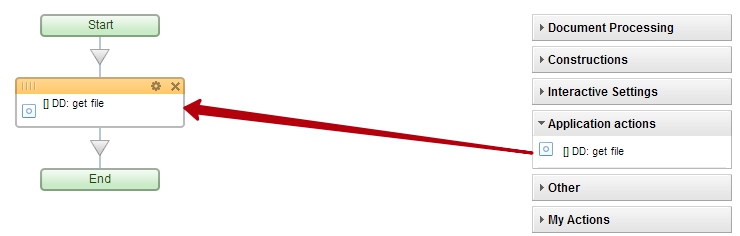
DocDesigner supports creation of documents while a Business Processes is executing.There are a few steps to setup it.
1. Put a special activity to your Business Process template.
2. Set parameters of activity.

2.1. You should set a main parameters of activity: template name, document type, save/not save a doc.
2.2. If you use parameters for DocDesigner template you should add same parameters to Business Process template and set a conformity for each by scheme ParamID={=ParamValue}.
2.3. Run as - it's very important setting. The user that is signed here will be get a notice about document creation. It's recomended to set here "Created by". It means that a notice will be sended to user which have run a Business Process.
3. Run Business Process via main interface of Bitrix24.
4. Wait for a while... When document is completed you'll get a notice.

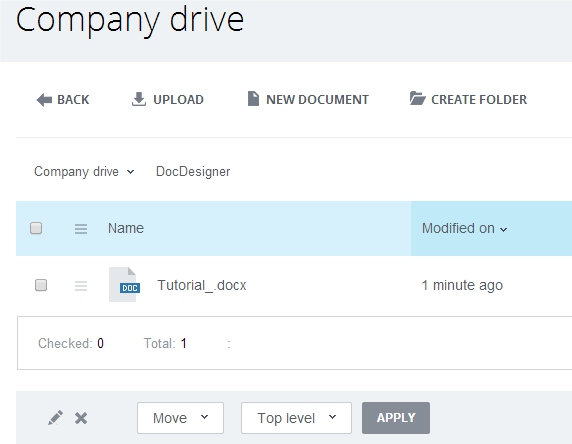
5. You may download a file or look for it on Company Drive. All documents will be stored on Company Drive in folder DocDesigner.
WebHooks
WebHooks - Events - Easy business processes...The webhooks model realises automatic creation document by CRM object modifying. Webhooks provides to realise "easy business processes" for "Free" and "Plus" tarifs of Bitrix24. It also can be interesting for "Standard" and "Professional" users for creating document based on Invoices and Quotation till standard business processes will be able.
The current webhook model is focused on a specific task (electronic document management), but can be extended with additional capabilities.
To connect the "Webhooks" extension you have to install the application " DocDesigner: Automation"
After installation, open the "DocDesigner", go to Settings for including webhooks to the DocDesigner.
What is it?
The webhook job consists of a description of event and a set of handlers to be executed.Currently supports the following types of events:
- deal added / changed transactions;
- invoice added / changed;
-
quote added / changed.
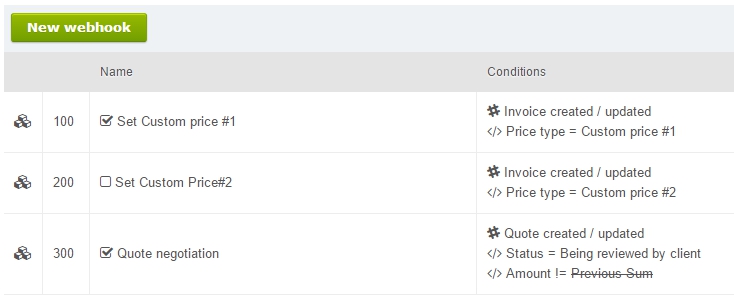
The webhook list is in the "Settings" - "Webhooks"
Webhook description
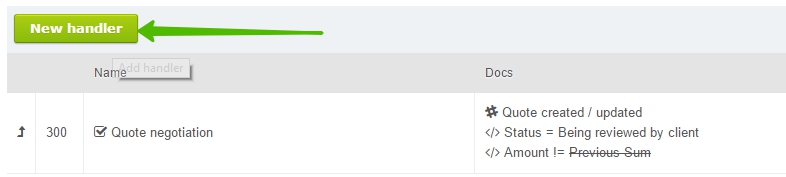
To add a description of the new webhook, click "New webhook".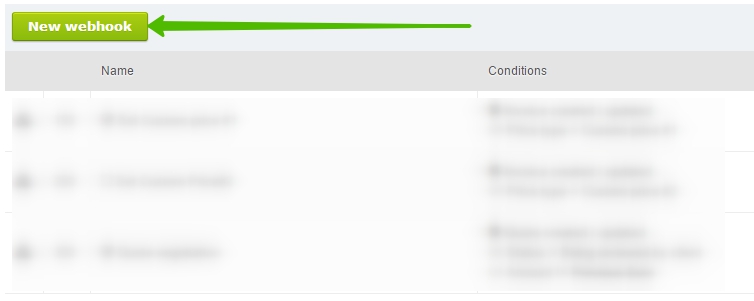
The webhook edit form will be opened.
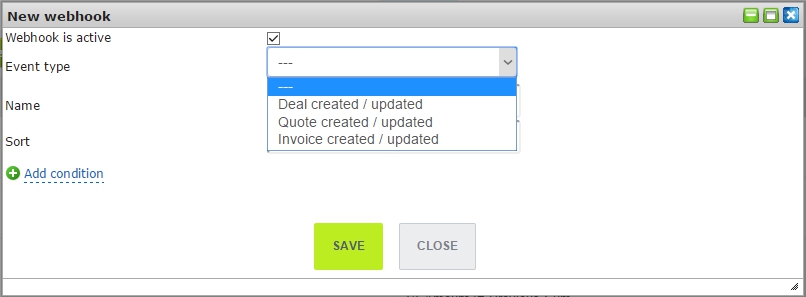
Select the type of event, specify the name and sorting.
Sorting affects the execution order of the events.
Activity flag to turn on / off events of this type.
Add conditions for execution the event.
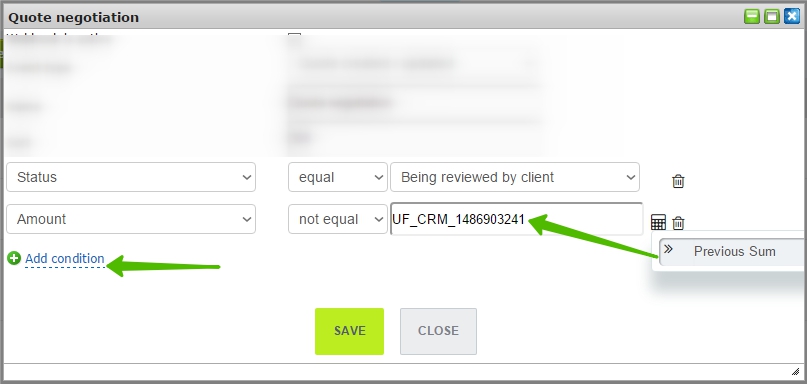
At any time you can edit the list of conditions.
After editing, click 'Save'.
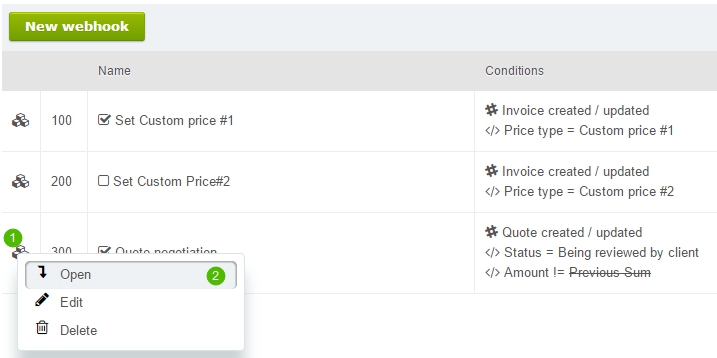
Webhook handlers
Webhook Handlers - is a set of activity to be performed in the prescribed sequence.To access the list of the specific webhook handlers invoke the context menu and select "Open".
Is realised types of handlers (action):
- to create a new document from a template;
- to send a letter;
- to create a task;
- to modify CRM object;
- to change price type
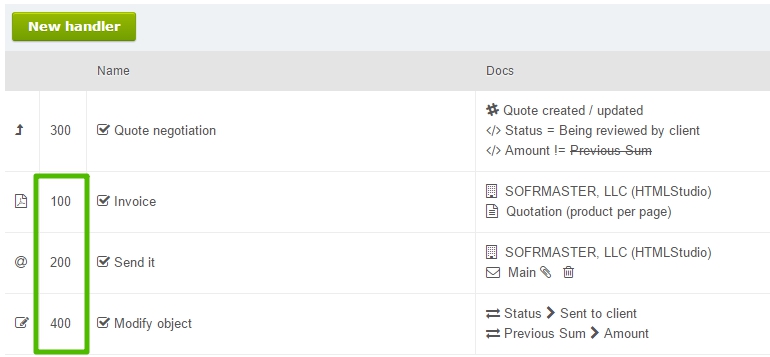
On the form, specify the name of the handler, and then select its type. Depending on handler type will be different activity settings.
The sort order is very important in the list of handlers. Activities will be carried out in that order.
After editing the settings, click "Save".
Each handler has a "Notification" field. If you'll save it blank, nothing will happen. If you'll specify there some text, you'll get a notification with specified text.
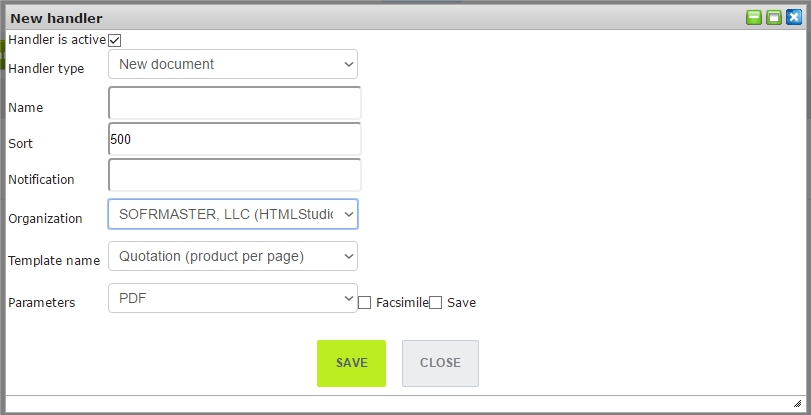
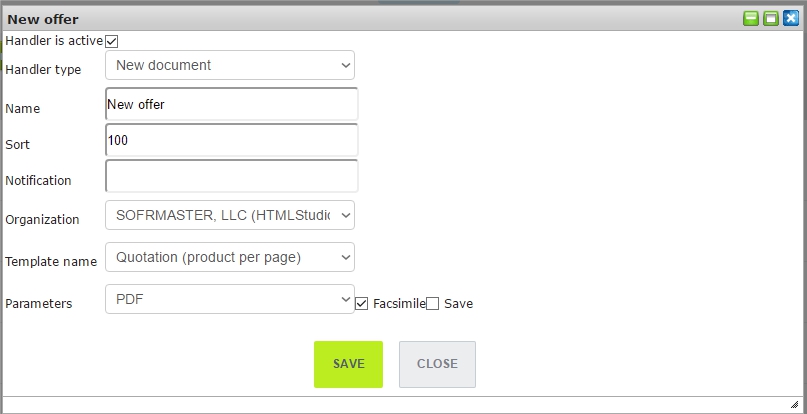
New document
New document - this handler is used to create a document in PDF / DOCX format by DocDesigner template.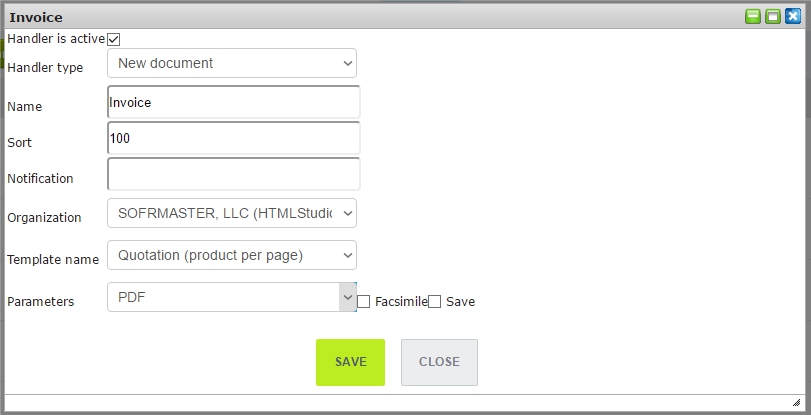
Specify the name of the handler, specify the order of execution and set the parameters for generating the document:
- own organization;
- contract template;
- document type PDF / DOCX;
- to put a facsimile and assign a number to the document.
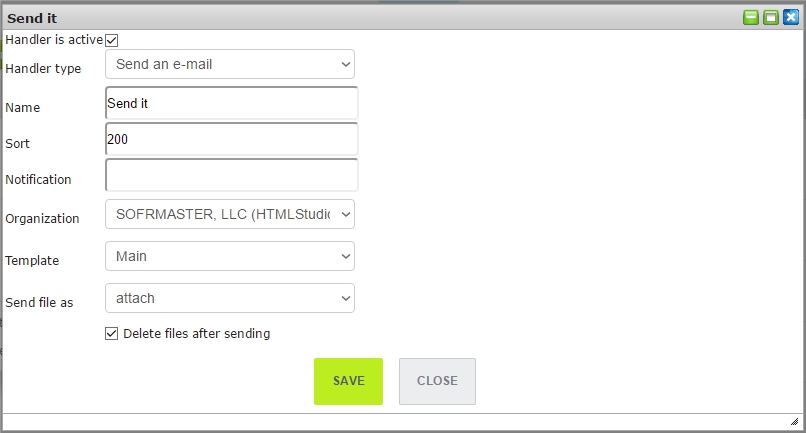
Send an e-mail
Send an e-mail - this handler sends an e-mail template with the previously created files.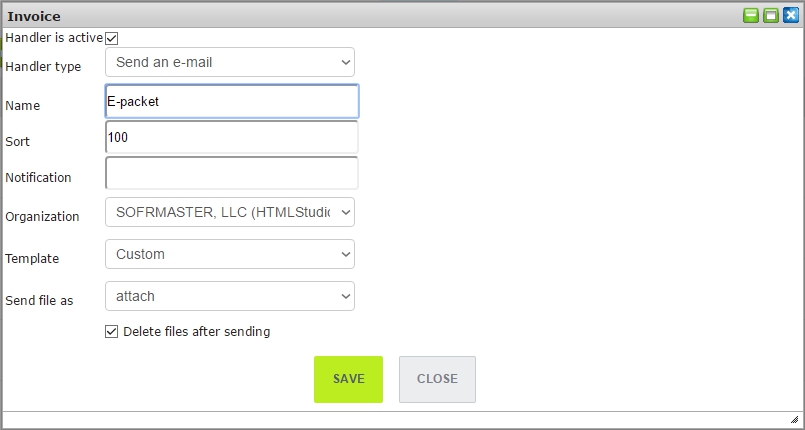
Specify the name of the handler, specify the order of execution and set the options for sending emails:
- own organization;
- letter template;
- type of uploaded files: an attachment or a link to Bitrix24.Disk;
- delete, if a document from the disk after shipment.
New task
Create task - is used to add a task with link to group and responsible.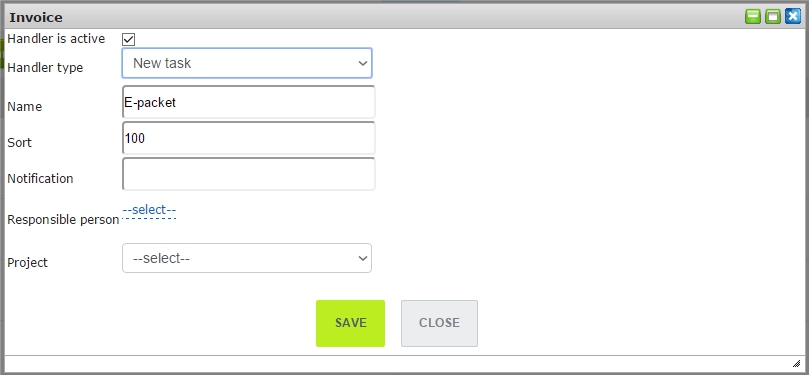
Modify object
Modify object - this handler sets the new values for the selected fields of CRM object.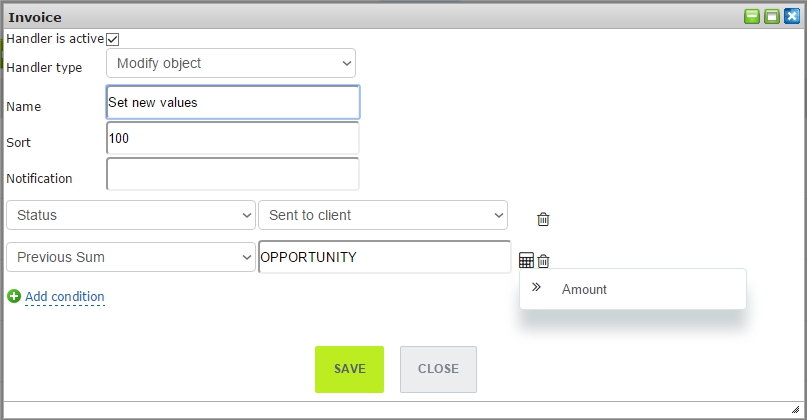
Specify the name of the handler, specify the order of execution and set new values for modifying fields.
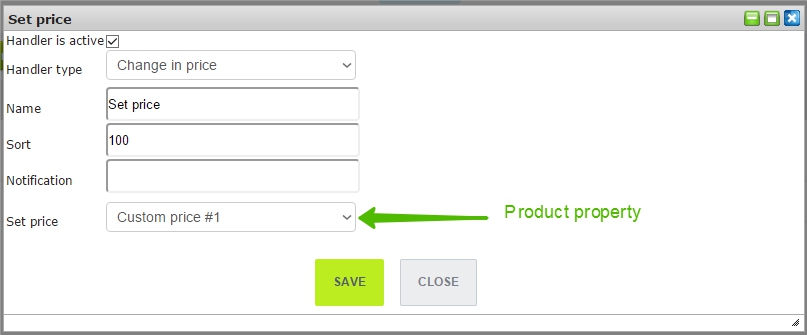
Change in price
Change price type - this handler allows to set several price types in Bitrix24.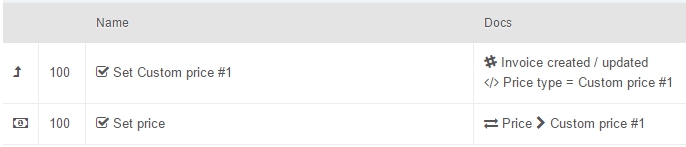
Specify the name of the handler, specify the order of execution and set the new price type from the product properties.
The case.
Cases
It is very important to carefully configure webhook handlers. The error can lead to an infinite execution handler. Here you can find some cases how to use webhooks.Here is a new offer
You've changed a price or quantity at the quote and you want to send new conditions to your customer...You had worked hard with a quote draft and you want to send it to customer by one click after quote state will be changed to "Being reviewed by client"...
What shall you do?
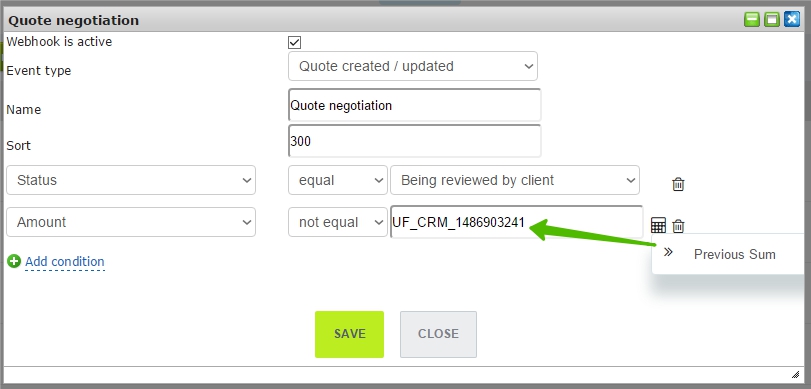
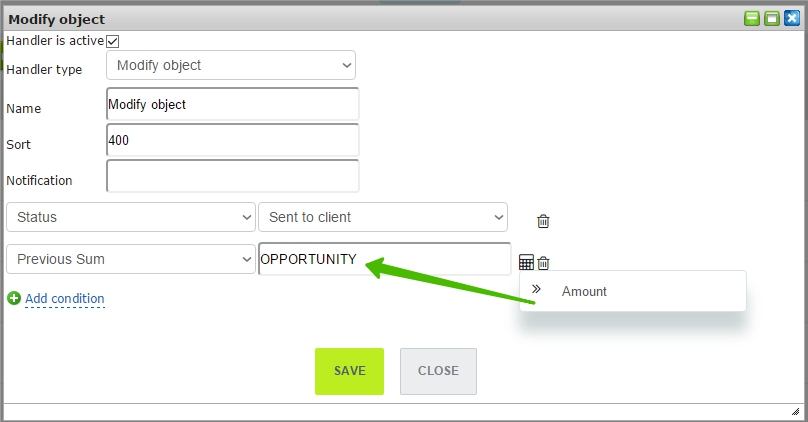
1. Add a new webhook for quote. Set reviewed state of quote and current amount is not "Previous Sum". "Previous Sum" is the custom field for quote with data type "number", it should be added before.
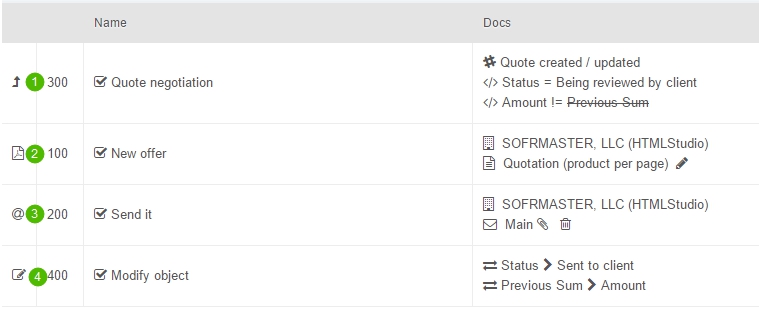
2. Add a handler to PDF creation.
3. Add a handler to send e-mail with new offer.
4.Set "Previous Sum" as current amount to excluding re-circle.
How does it work?
1. You've saved a quote. The webhook is looking through events descriptions. If quote state is "Being reviewed by client" and custom field "Previous Sum" is not "Amount", handlers will be run. In other case nothing will happen.
2. Will be created a PDF.
3. PDF will be sended by e-mail as attach, after that file will be deleted from disk.
4. The quote fields will be modified. "Previous Sum" will be set equal amount, quote state will be set as "Sent to client".
Change in price
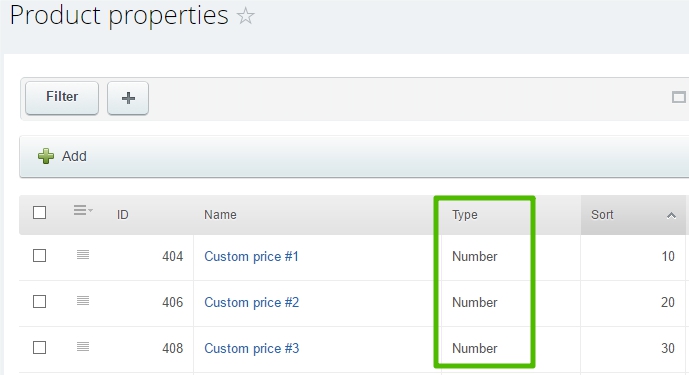
Change price type - this case describe how to set several price types in Bitrix24.1. Create some product properties with data type "number" to specify additional price:
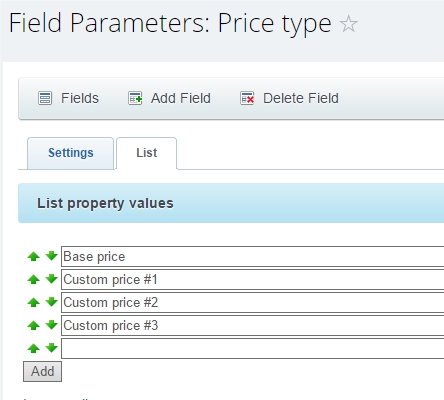
2. Add to the Invoice (deal, quote) a custom field with data type "list" and add values to the list:
3. Create a webhook description and specify the condition for the handler run:

1) object and event type;
2) object's custom field;
3) custom field value.
4. Set the new price type for the handler job
How does it work?
1. You've saved invoice.
2. The webhook is looking through events descriptions. If user field "Price type" is not "Custom price #1", nothing will happen. In other case handler will be run.
3. The handler is looking through product table and comparing current price with "Custom price #1", if it different it'll set the new value.
4. The invoice will be saved.
5. In case "Notification" will be specified, you'll get a notification with specified text.
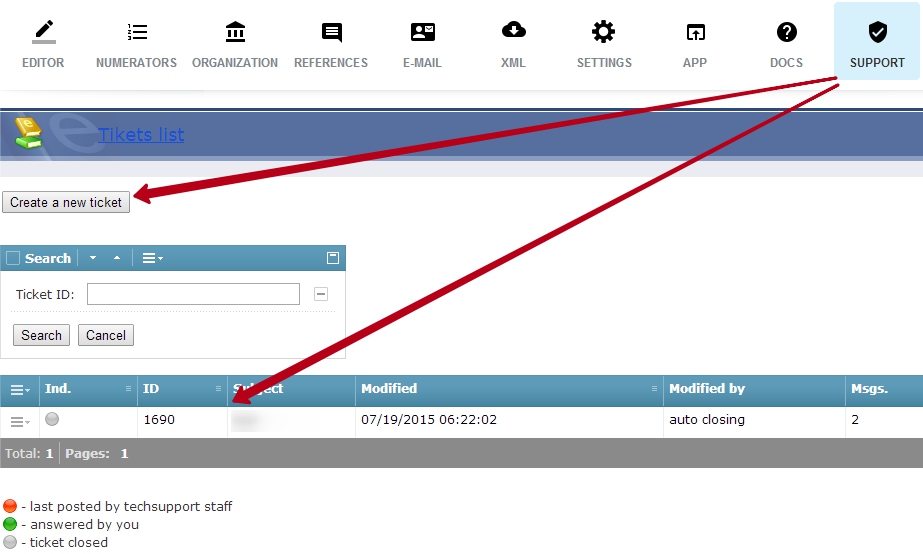
Support
If you have issue, idea, request, you can use built-in Support feature.